Drawing dogs has become a favorite pastime for beginners, kids, and hobby artists alike. Whether it’s a cute cartoon puppy, a fluffy golden retriever, or a loyal-looking hound, dogs are one of the most enjoyable and expressive animals to sketch. But many aspiring artists still ask the same question: how to draw a dog that actually looks like a dog — not a strange-looking creature with four legs?
The challenge isn’t just about talent. Most people struggle because they don’t know where to start, how to break the dog down into basic shapes, or how to add just the right details to bring it to life. That’s where a clear, structured approach makes all the difference.
In this tutorial, you’ll learn how to draw a dog like a pro in just six simple steps. Whether you’re sketching for fun, improving your skills, or helping your kids learn to draw, this guide will show you how to build a clean outline, add facial features, work with fur texture, and finish your dog drawing with confidence — all while saving time and enjoying the process.
Ready to grab your pencil and start sketching? Let’s break it down step by step.
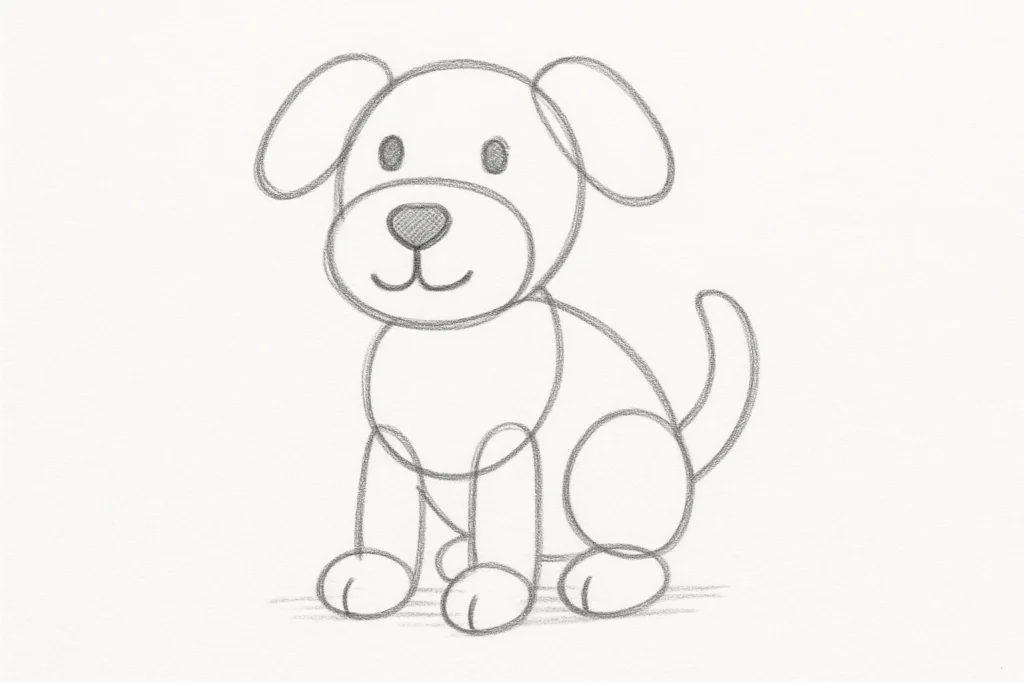
Step 1 – Start with the Basic Dog Shape
The foundation of every great dog drawing starts with the shape. Before you dive into the eyes, fur, or shading, it’s essential to block in the structure. If you’ve ever tried to sketch a dog and ended up with something that looked more like a cat or a bear, chances are your proportions and basic form were off. Learning how to draw a dog begins by mastering the overall layout — and keeping things simple.
Why Structure Matters in Dog Drawing
Dogs come in many sizes, but their basic body layout is remarkably similar. A well-structured sketch ensures your drawing feels balanced and natural. Structure gives you a road map: where the head connects to the body, how the back legs are positioned, and how the neck supports the head. Without this step, your final drawing might look flat, awkward, or out of proportion.
By focusing first on shape and alignment, you set yourself up for success. It’s like building a house — you need the frame before you paint the walls.
Using Simple Shapes to Build the Body
One of the best tricks for learning how to draw a dog is to break the body down into basic forms. Start with a circle for the head and another for the chest. The pelvis or hip area can also be represented by a slightly smaller oval or circle. Then, use soft guidelines to connect these major parts, forming the spine and belly.
You don’t need to be precise at this stage. These shapes act as placeholders and help you visualize the dog’s overall posture — sitting, standing, walking, or even lying down. Light sketching is key here; keep your lines faint so you can erase or refine them later.
Positioning the Limbs and Tail
Once the torso and head are in place, add the legs and tail. Use long ovals or rectangles to sketch the upper and lower portions of the legs. Pay attention to the joints — especially the elbows and knees. Dogs have a slightly angled leg structure, especially in the back, which gives them their natural stance.
The tail can be a simple curved line at this stage, placed based on the dog’s breed and posture. Whether it’s curled, drooping, or wagging, placing it early will help complete the balance of your outline.
Use light pencil guidelines to explore different poses, especially if you’re not following a reference image. Keep checking that the limbs feel grounded and that the dog doesn’t appear like it’s floating or tipping forward.
Common Mistakes Beginners Make
Even though the basic shape seems easy, there are a few beginner mistakes to avoid:
- Making the head too large or too small for the body
- Placing the legs too far apart or unevenly aligned
- Drawing the body as a straight line instead of following the natural curve of the spine
- Skipping the tail placement entirely or attaching it at the wrong angle
- Ignoring the space between the front legs, which gives structure to the chest
Remember: structure isn’t about perfection — it’s about flow, proportion, and preparing your drawing for the details that follow.
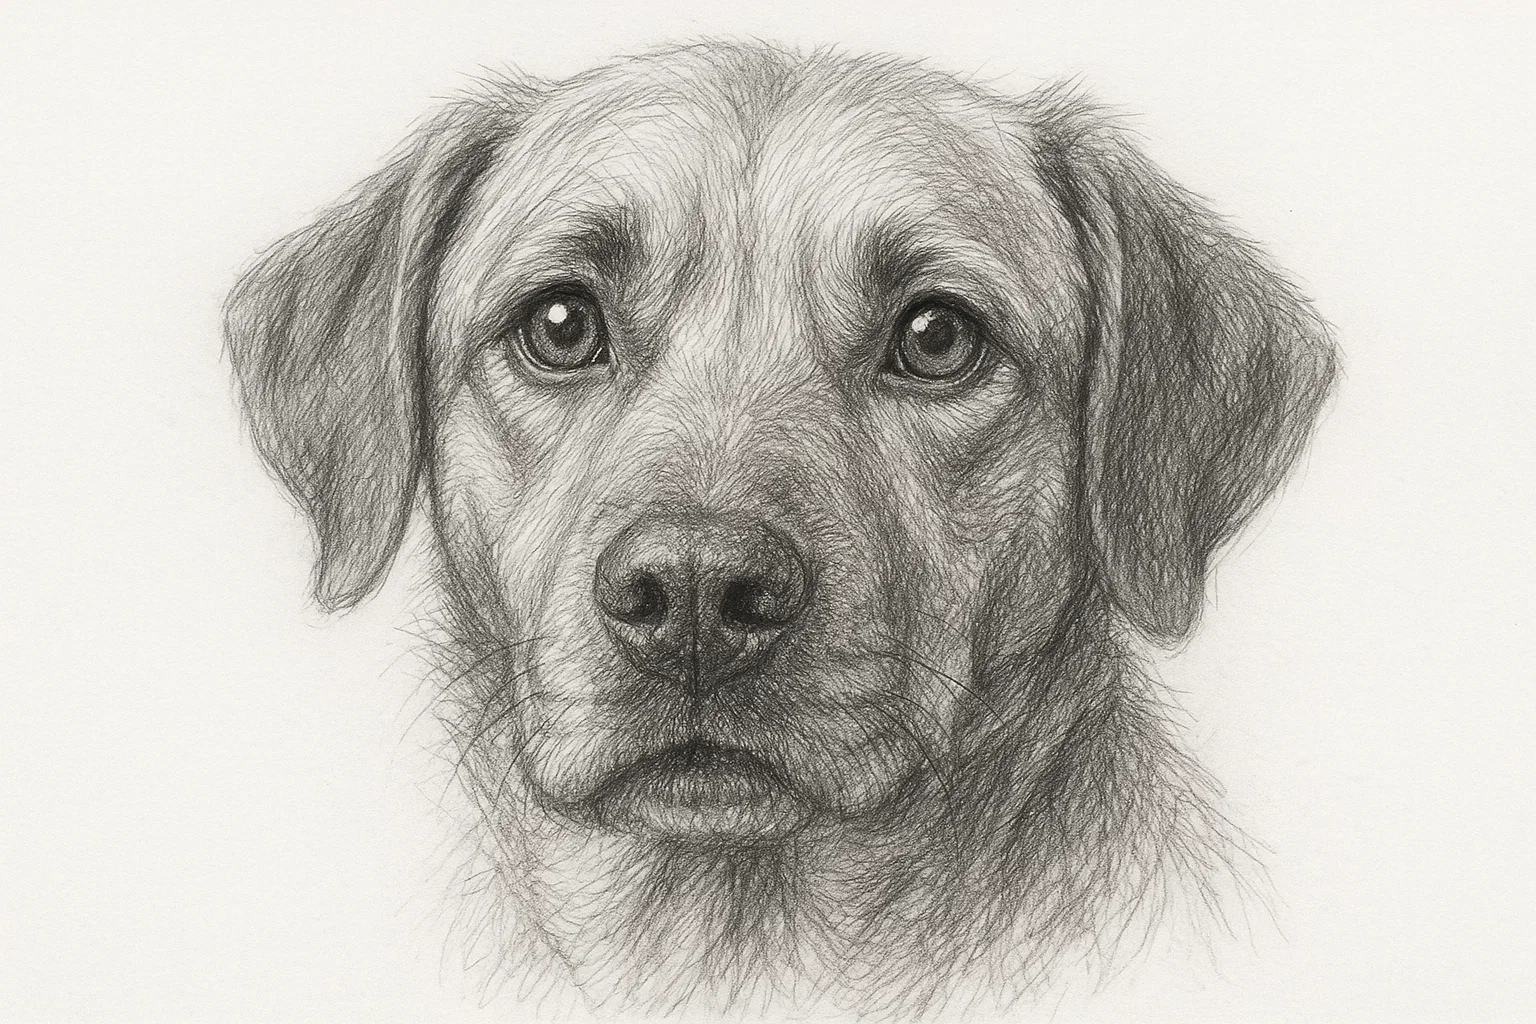
Step 2 – Sketching the Face and Features
The face is the most expressive part of your drawing. It’s where a simple line can turn your sketch from lifeless to full of charm. Whether you’re aiming for a realistic portrait or a playful cartoon pup, getting the facial features right is essential. One of the biggest differences between a good drawing and a great one comes down to how well the face reflects the dog’s personality. That’s why when learning how to draw a dog, this step deserves special attention.
Drawing the Eyes and Expression
The eyes are what make a dog drawing come alive. Even the most basic sketch can feel warm and full of emotion with well-placed, expressive eyes. Start by sketching two almond or circle-shaped eyes — depending on the style you want — positioned roughly one eye’s width apart on the head.
For a realistic look, leave a small white highlight in each eye to reflect light and add depth. You can use a slightly darker line or pupil to bring focus. For a cartoon style, larger eyes with exaggerated lashes or brows can create a cute or goofy personality.
Eyes are also the key to capturing emotion — wide eyes for excitement, droopy eyes for calm or sadness, and angled eyes for playfulness or mischief.
Shaping the Snout and Nose
Once the eyes are in place, it’s time to draw the snout, which includes the nose and the muzzle. Most dogs have a gentle slope from the forehead to the nose. Lightly sketch a bridge that connects the eyes to the tip of the nose, then build the shape outward from there.
For a realistic dog, make the nose rounded or heart-shaped, and position it slightly below the eye level, centered on the snout. Add nostrils with soft, curved lines and a small shadow underneath for dimension.
For a cartoon dog, you can play around with the size and placement — a big round nose can make the dog look more playful or silly. Just be sure to keep it balanced with the eyes and head shape.
How to Draw Dog Ears
Ears are one of the most fun and expressive parts to draw. They also vary significantly depending on the breed. Floppy ears, upright ears, pointed ears, or even folded ears — each adds a different tone to your dog’s personality.
Start with soft triangle shapes, attached above or behind the eyes, depending on how the head is tilted. For floppy ears, let them hang down along the sides of the head. For upright ears, keep the angles sharp and slightly rounded at the tips.
Be mindful of ear symmetry and how they attach to the head. Uneven ears are a common mistake, especially if the dog’s head is not facing forward. Use reference photos if needed.
Adding the Tongue or Open Mouth
Adding a tongue or an open mouth is optional but can bring extra life and charm to your drawing. A tongue hanging out makes the dog look happy, tired, or playful. Draw a soft U-shape for the tongue, and nest it inside a gently curved mouth.
For an open mouth, sketch a curved line for the upper lip and a wider one below for the lower jaw. Add a line to separate the lips and use subtle shading to create depth. Don’t forget that a slightly tilted head and a lolling tongue can make your dog drawing irresistibly cute.
Even small facial features can transform your sketch, so take your time in this step. If you’re mastering how to draw a dog, the face is where your skills — and your dog’s personality — truly shine.
Step 3 – Adding Details and Texture
Once your dog’s basic structure and face are complete, it’s time to bring your drawing to life with texture and small features. These finishing touches make your sketch more dynamic and expressive. Whether you’re going for a soft, fluffy pup or a short-haired hound, the way you handle fur, paws, and shading plays a big role in the final result. If you’re serious about learning how to draw a dog that looks polished and professional, this is where the magic happens.
Light Fur vs. Fluffy Fur
Fur texture is one of the most recognizable traits in a dog drawing. To keep it believable, use your pencil strokes to follow the natural direction of the fur on different parts of the body. For short or light fur, use short, quick strokes with light pressure. Keep the strokes close together to create a smooth coat.
For long or fluffy fur, use slightly longer strokes with varying pressure. Add a bit of overlap and loosen the line direction to give it a natural, airy look — especially around the ears, chest, and tail. Don’t forget to leave some white space for highlights, which will add dimension and keep the fur from looking flat.
Always work in layers, starting lightly and building up texture as needed.
Drawing Paws and Claws
Many beginners overlook paws, but they’re essential to making the drawing feel grounded and complete. Paws can be simplified into oval or bean-like shapes. Most dogs have four visible toes on each foot, and each toe contains a small claw.
Start by drawing a rounded paw pad and place the toes evenly above it. Use soft curves — dog paws are rarely sharp or angular. For the claws, a small arc or triangle at the tip of each toe is enough. Avoid over-detailing unless you’re going for hyper-realism.
The position of the paws also tells a story — whether the dog is standing firm, stretching, or relaxed. Keep that in mind when drawing front vs. back paws.
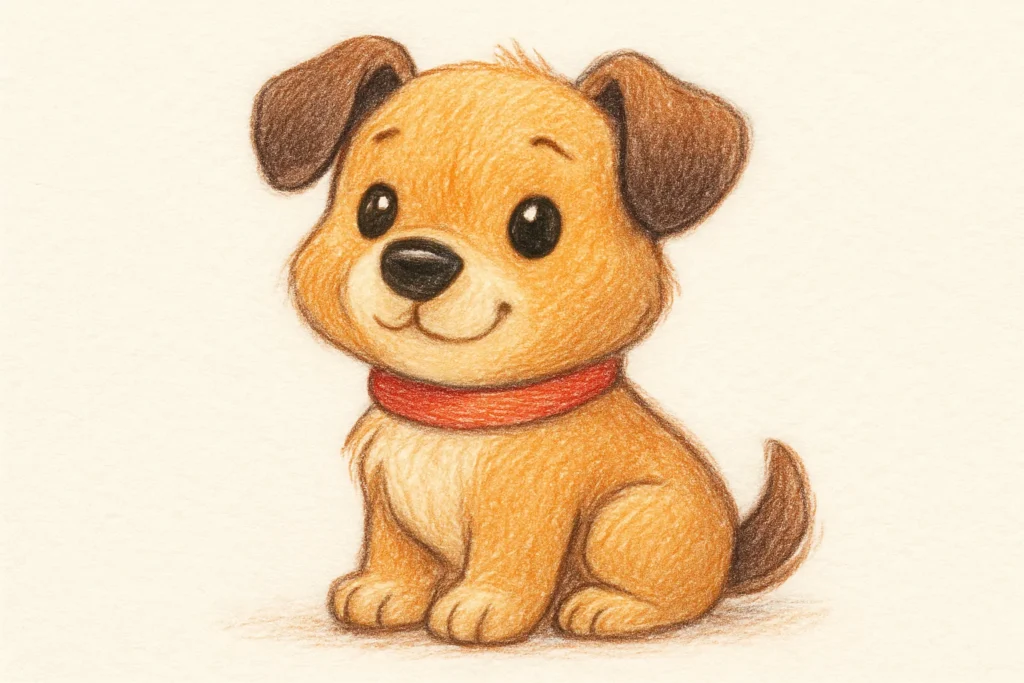
Collars, Tags, or Accessories
Want to personalize your dog drawing? Adding accessories like collars, name tags, or even a toy can make your sketch feel more fun and unique. A simple collar can be drawn as a horizontal band around the neck with a circular or bone-shaped tag in the center. For realism, add slight curves where the collar wraps around the neck and a few shadows beneath it.
You can also include things like bandanas, a ball, or a leash — just make sure these additions don’t distract from the overall composition.
These fun details help tell a story and add personality, especially if you’re drawing a dog based on a real pet.
How to Shade for Realism
Shading is the final step that pulls everything together. Use light pencil shading to create depth, volume, and a sense of lighting. Imagine a light source and shade the opposite side of the body, snout, legs, and under the ears.
Use softer pencils (like 2B or 4B) for darker shadows and a harder pencil (like HB) for lighter areas. Blend lightly with a tissue or blending stump if desired, but don’t overdo it — too much blending can erase the texture you’ve created.
Focus on areas where the light would naturally be blocked: beneath the belly, behind the ears, under the chin, and between the legs. If you’re working in black and white, contrast becomes your best friend.
Learning how to draw a dog also means learning how to finish your drawing with confidence — and great shading is what separates a flat sketch from a realistic one.
Step 4 – Final Touches and Coloring
Now that your dog drawing has structure, facial features, and texture, it’s time to polish your work. These final touches bring everything together — making your sketch look clean, complete, and even ready to share. Whether you’re keeping it in pencil or adding color, these steps will help you finish strong. If you’re serious about learning how to draw a dog with confidence, don’t skip this part — it’s where the drawing truly comes to life.
Outlining the Final Drawing
Start by erasing any extra sketch lines or construction shapes you used earlier. You want to keep the essential lines while removing the clutter. This step helps define the final form and gives your drawing a more professional look.
Use a slightly harder pencil or a fine pen to trace over the main lines. Keep your strokes steady and clean — avoid pressing too hard or scribbling. This is the time to refine curves, fix any awkward angles, and smooth out your dog’s silhouette.
If you’re working digitally, this step may be done on a separate layer. Traditional or digital, a clean outline sets the stage for the final render.
Choosing Tools for Inking
If you’re ready to take your drawing further, inking is a great way to make your lines stand out. Artists often use fine liners, brush pens, or felt-tip pens to add clarity and boldness to their sketches.
For sharp and controlled lines, go with fine liners (0.1mm to 0.5mm). For expressive, flowing lines, try a flexible brush pen. Just make sure the ink is smudge-resistant if you plan to color on top.
Inking can be intimidating, especially if you’re used to pencils — so feel free to practice on a separate copy. For more pro-level inking tips, check out this helpful guide from Wacom on how to draw a dog, which walks through both analog and digital techniques.
Simple Coloring Techniques
Adding color to your dog drawing is optional — but it’s also one of the most fun and creative steps. You can use colored pencils, markers, or even digital tools depending on your preference.
If you’re using colored pencils, start light and layer darker tones gradually. For markers, use alcohol-based options for smooth blending, and always color in the direction of the fur. If you’re working digitally, use soft brushes for blending and adjust opacity for shading.
Want to keep your drawing realistic? Stick to natural tones: beige, browns, grays, and white. Want it to be playful? Use pastel or vibrant colors. You’re the artist — make it yours.
Looking for inspiration? You might also enjoy our tutorial on can dogs eat avocado, where we explored both canine safety and fun visual storytelling — a great mix if you plan to illustrate blog content yourself.
Saving and Sharing Your Artwork
Once your drawing is complete, don’t let it sit in your sketchbook forever. Take the time to scan or photograph it using good lighting. If digital, export a high-resolution version for sharing online.
You can also upload your drawing to social platforms, digital portfolios, or even turn it into printable art. Don’t forget to sign your work — it adds a finishing touch and gives you credit for your creativity.
Every dog drawing you finish is a step forward in your artistic journey. And now that you know how to draw a dog from start to finish, you’re ready to create and share with pride.
Fazit
Learning how to draw a dog may seem intimidating at first, especially for beginners. But as this guide has shown, success doesn’t come from natural talent alone — it comes from following a structured process. Starting with simple shapes, adding expressive features, layering in details, and finishing with clean lines and color are the building blocks of any great dog sketch.
Each step — from the basic form to the final outline — plays a crucial role in creating a drawing that feels complete and alive. With practice, you’ll avoid common mistakes, gain confidence, and develop your own unique style.
So, if you’ve ever wondered how to draw a dog that actually looks good, the answer is clear: it’s all about patience, repetition, and breaking it down step by step. Don’t wait for inspiration to strike. Grab your pencil (or tablet), follow the 6 steps, and start sketching today.
And once you’re done, don’t keep it to yourself — share your drawing, compare progress over time, and explore other tutorials to keep growing. Every artist started somewhere — this could be your beginning.